sed -i '$a\date\.timezone\=PRC' `find /home/httpd -mindepth 2 -maxdepth 2 -type f -name "php.ini" `
2014年12月21日星期日
批量修改kloxo下的php时区问题
2014年10月20日星期一
2014年9月12日星期五
kvm虚拟机日常管理与配置
查看kvm虚拟机状态
# virsh list --all
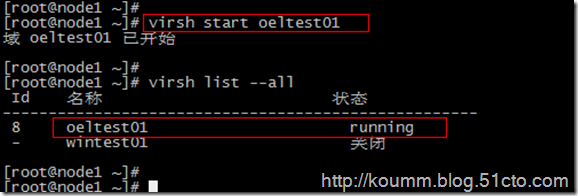
2. KVM虚拟机开机
# virsh start oeltest01
3. KVM虚拟机关机或断电
(1) 关机
默认情况下virsh工具不能对linux虚拟机进行关机操作,linux操作系统需要开启与启动acpid服务。在安装KVM linux虚拟机必须配置此服务。
# chkconfig acpid on
# service acpid restart
# service acpid restart
virsh关机
# virsh shutdown oeltest01
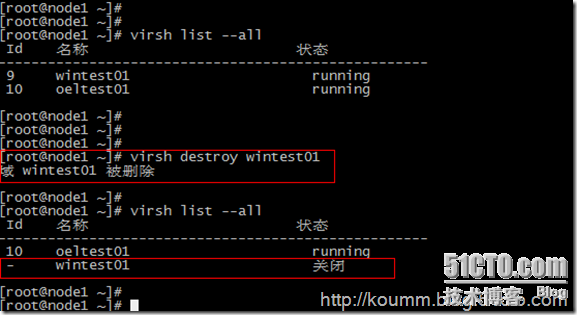
(2) 强制关闭电源
# virsh destroy wintest01
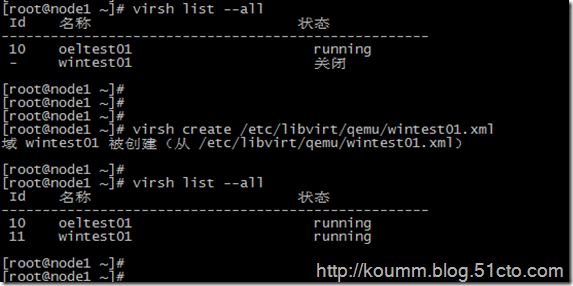
4. 通过配置文件启动虚拟机
# virsh create /etc/libvirt/qemu/wintest01.xml
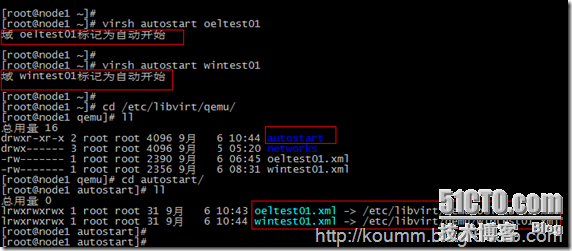
5. 配置开机自启动虚拟机
# virsh autostart oeltest01
autostart目录是kvm虚拟机开机自启动目录,可以看到该目录中有KVM配置文件链接。
6. 导出KVM虚拟机配置文件
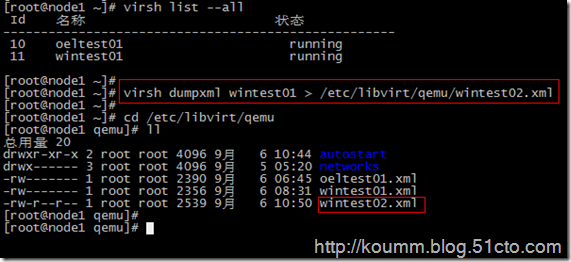
# virsh dumpxml wintest01 > /etc/libvirt/qemu/wintest02.xml
KVM虚拟机配置文件可以通过这种方式进行备份。
7. 添加与删除KVM虚拟机
(1) 删除kvm虚拟机
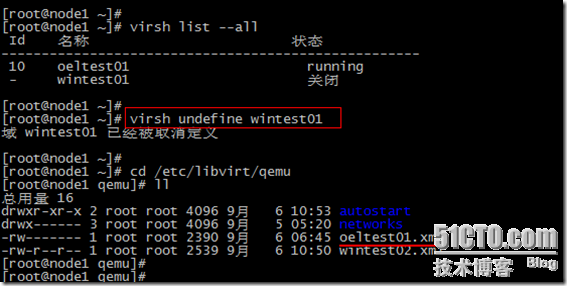
# virsh undefine wintest01
说明:该命令只是删除wintest01的配置文件,并不删除虚拟磁盘文件。如下图所示。
(2) 重新定义虚拟机配置文件
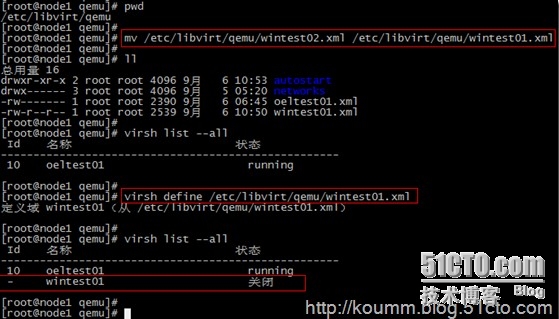
通过导出备份的配置文件恢复原KVM虚拟机的定义,并重新定义虚拟机。
# mv /etc/libvirt/qemu/wintest02.xml /etc/libvirt/qemu/wintest01.xml
# virsh define /etc/libvirt/qemu/wintest01.xml
8. 编辑KVM虚拟机配置文件
# virsh edit wintest01
virsh edit将调用vi命令编辑/etc/libvirt/qemu/wintest01.xml配置文件。也可以直接通过vi命令进行编辑,修改,保存。
可以但不建议直接通过vi编辑。
[root@node1 qemu]# vi /etc/libvirt/qemu/wintest01.xml
1
2
3
4
5
6
7
8
9
10
11
12
13
14
15
16
17
18
19
20
21
22
23
24
25
26
27
28
29
30
31
32
33
34
35
36
37
38
39
40
41
42
43
44
45
46
47
48
49
50
51
52
53
54
55
56
57
58
59
60
61
62
63
64
65
66
67
68
69
70
| |
'utc'/>destroy restart restart /usr/libexec/qemu-kvm 'file' device='disk'>'qemu' type='raw' cache='none'/>'/data/wintest01.img'/>'hda' bus='ide'/>
'drive' controller='0' bus='0' target='0' unit='0'/>
'block' device='cdrom'>'qemu' type='raw'/>'hdc' bus='ide'/>
'drive' controller='0' bus='1' target='0' unit='0'/>
'usb' index='0'>
'pci' domain='0x0000' bus='0x00' slot='0x01' function='0x2'/>
'ide' index='0'>
'pci' domain='0x0000' bus='0x00' slot='0x01' function='0x1'/>
<interface type='bridge'>'52:54:00:2b:2f:fe'/>'br0'/>
'pci' domain='0x0000' bus='0x00' slot='0x03' function='0x0'/>
</interface>'pty'>'0'/>'pty'>'serial' port='0'/>'mouse' bus='ps2'/>'vnc' port='5911' autoport='no' listen='0.0.0.0'>'address' address='0.0.0.0'/>'cirrus' vram='9216' heads='1'/>
'pci' domain='0x0000' bus='0x00' slot='0x02' function='0x0'/>
'virtio'>
'pci' domain='0x0000' bus='0x00' slot='0x04' function='0x0'/>
'none'/>9. virsh console 控制台管理linux虚拟机
配置virsh console见下文
# virsh console oeltest01
10. 其它virsh命令
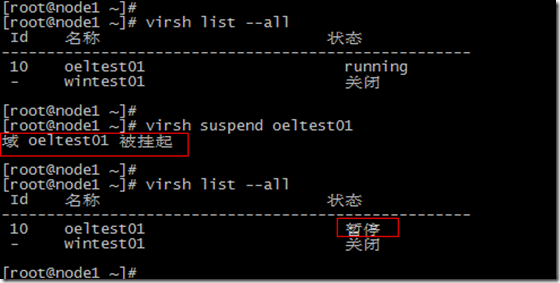
(1) 挂起服务器
# virsh suspend oeltest01
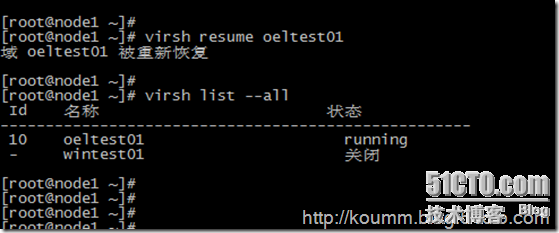
(2) 恢复服务器
# virsh resume oeltest01
virsh命令丰富。可以执行各种维护任务,本文只是从维护与管理的角度例举了常用的命令,为该命令的使用提供一个思路。
扩容/dev/mapper/pve-root
.执行 parted /dev/sdq 输入 print 找到要扩容的盘,应该是/dev/sdq3,检查大小 resizepart 3 100% quit 再检查大小 退出parted 更新物理卷的大小,当然这里前提是使用了LVM pvresize /dev/sda3 lvdis...
-
The Raspberry Pi 4 can drive up to two displays, with a resolution up to 1080p at a 60Hz refresh rate. At 4K resolution, if you connect two...
-
核心参数 参数 作用 适用场景 建议值 size 副本数量,决定数据在 OSD 之间的冗余度 2-3 副本保证数据安全 生产环境建议 3 ,测试环境 2 min_size 最小副本数,低于该值时数据不可写 一般设置为 size 的一半 size / 2 向上取整,例如 2...
-
510-01:~$ cat /proc/mdstat Personalities : [raid1] [raid0] [raid6] [raid5] [raid4] [raidF1] md2 : active raid5 sdj5[1] sdt5[11] sds5[9] sd...

